In the past 10 years online streaming platforms have become increasingly popular, and as most nightclubs around the world are still closed, we are forced to find other ways to express our music to new audiences. With this first article and future articles on our blog we hope to inspire you with new possibilities and workflows that weren’t possible before.
This first article will focus on the tools you can use to do an online audiovisual performance using Ableton Live, Videosync, OBS and Twitch. The online stage is still relatively new territory for musical performers, so I’m excited to share these new possibilities with you so you could do your own audiovisual performance, or simply use Ableton Live and Videosync as an the audiovisual engine for whatever you want to present online.
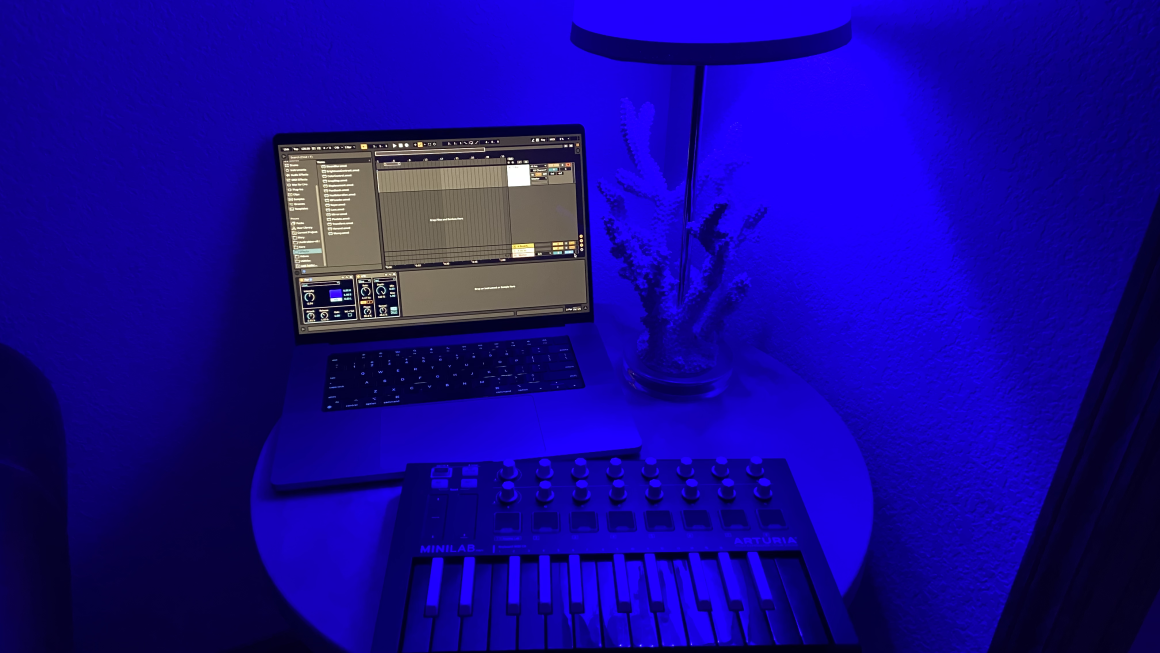
What you need for this tutorial:
- Ableton Live 10 with access to Max for Live
- Videosync
- OBS
- A streaming platform account and Stream Key
The streaming platform
In this article we use Twitch, but Twitch is not the only available streaming platform out there. Some of the others are Facebook, YouTube and Restream. The latter can be used to stream to multiple platforms all at once.
If you don’t have an account with Twitch yet, it’s free and very easy to make one. The only thing you really need to connect OBS to Twitch is your personal Stream Key. Once you have created your account, you can find your Stream Key in the Preferences/Channel tab on the Twitch’s Creator Dashboard. Copy your Stream Key to the clipboard or a text document for later use.

Live + Videosync
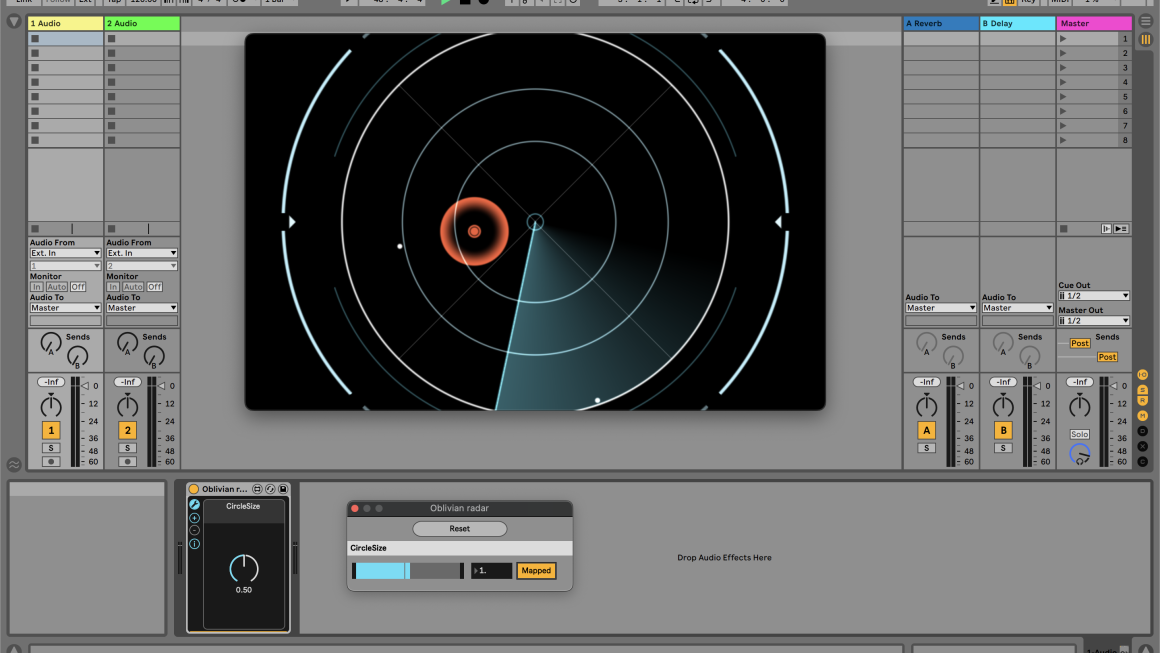
If you have already installed Live and Videosync, the next step will be to send Videosync’s output to OBS. While setting things up as we go, it’s a good idea to have a video play in Live’s Session View so that we don’t just see a black screen the entire time.
After having a video play in Live, open Videosync’s Preferences, go to the IO tab, and enable the Master Syphon Out option.

Where Rewire allows for sending audio from one application to another, Syphon does the same for video. Once the Master Syphon Out of Videosync has been enabled, we’ll have to enable an input for it in OBS.
OBS

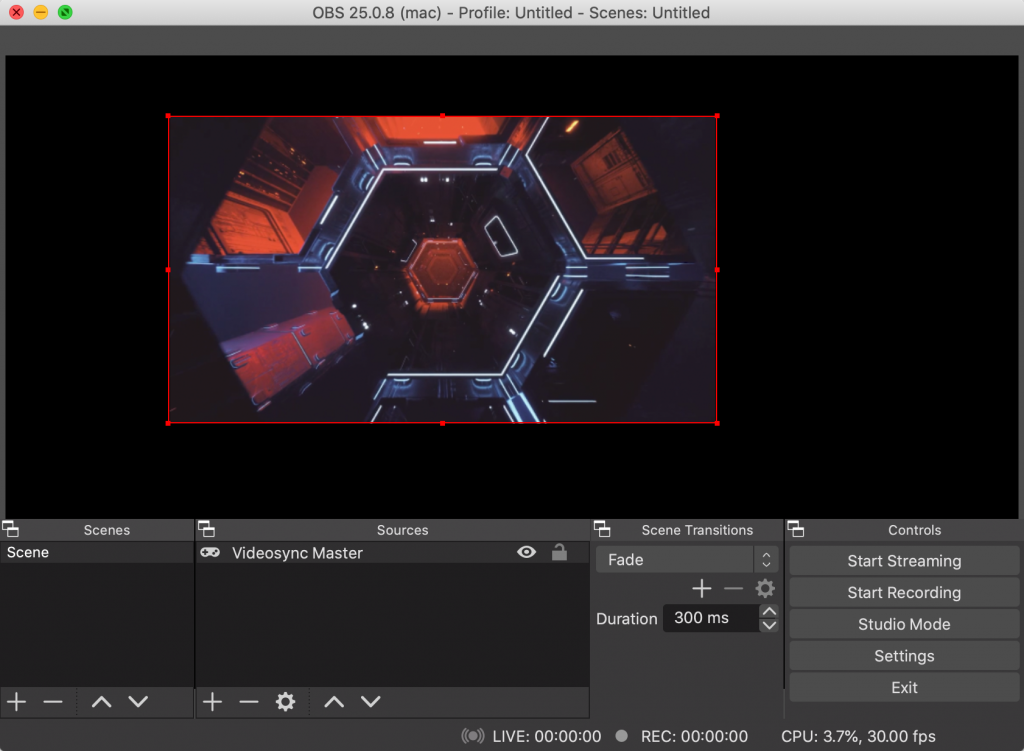
When launching OBS for the first time, a blank window will appear with a number of sections with options underneath it. The first section in the bottom left is Scenes. A scene is a composition of one or multiple video Sources. When selecting a source in Sources section, handles will appear in the output screen that will allow us to reposition and resize the image.
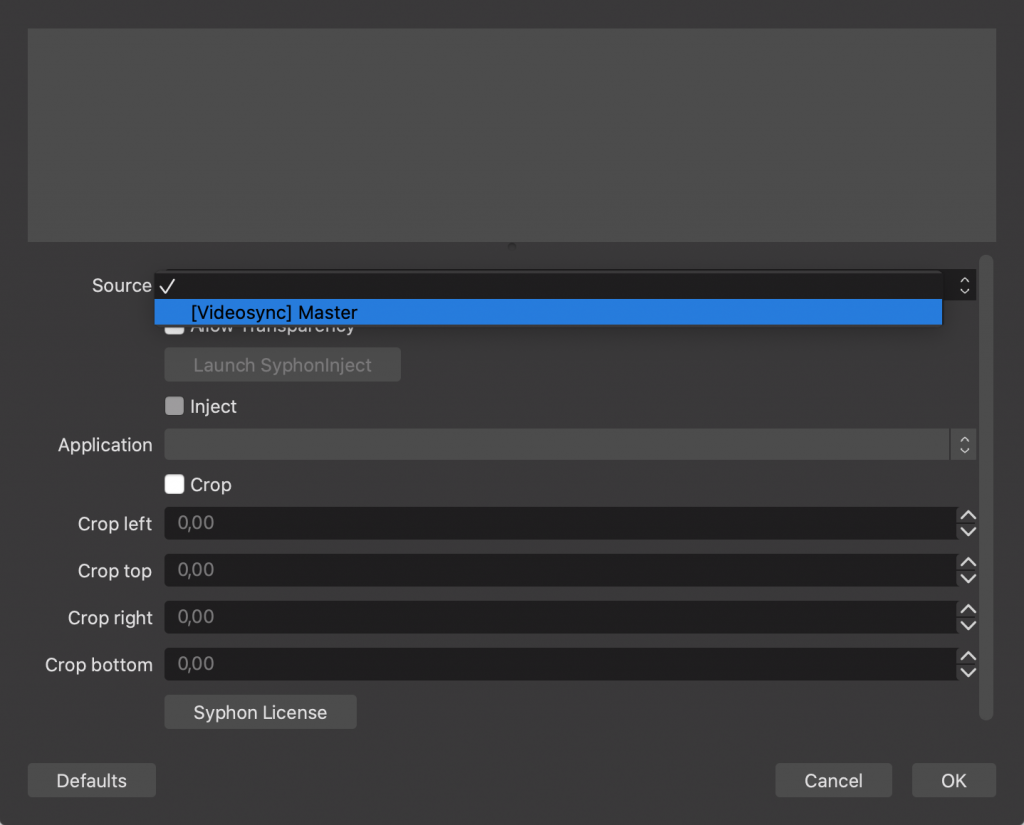
To check if OBS receives the Syphon output of Videosync, we first have to specify a source. In the Sources tab, click on the plus icon to add a new source. About 15 options will appear; pick Syphon Client.
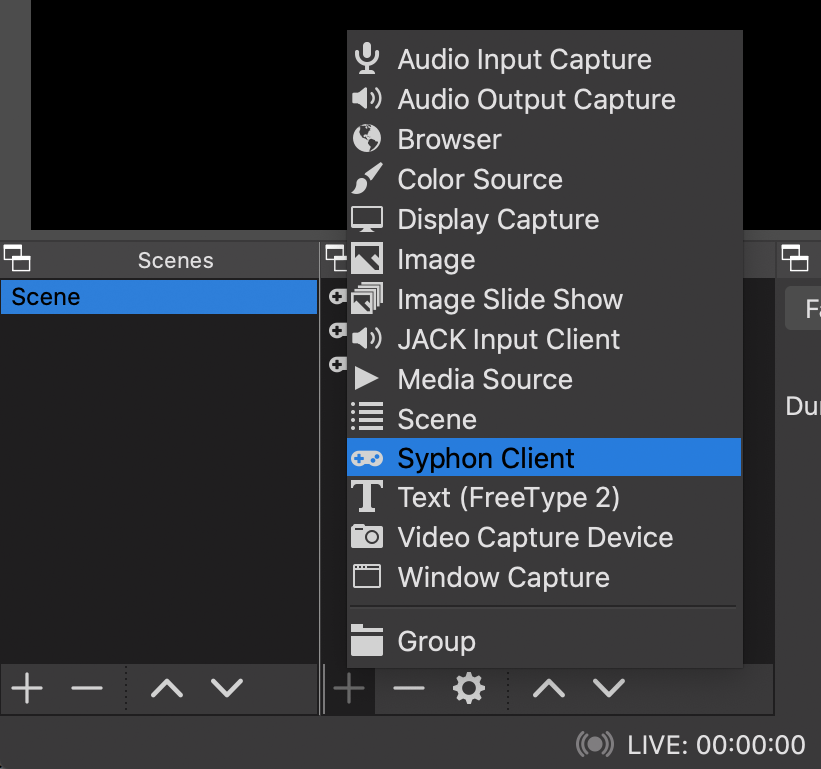
A small window will popup, asking if we’ll want to add this as a New or add an existing source the selected Scene.

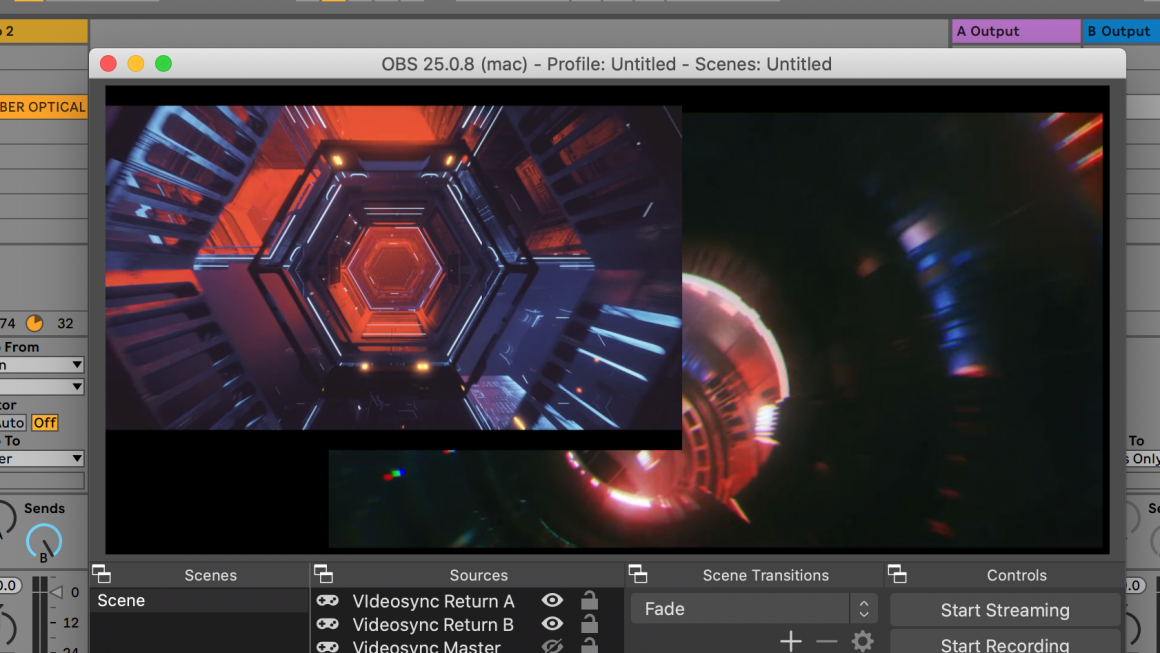
Once we click OK, another window Properties will open. Here we can select the actual Syphon source, and if everything went well we should see Videosync’s output as an available option.
Hit okay when you’re done, and see if the video playing in Live is showing in OBS’s main window:
OBS settings
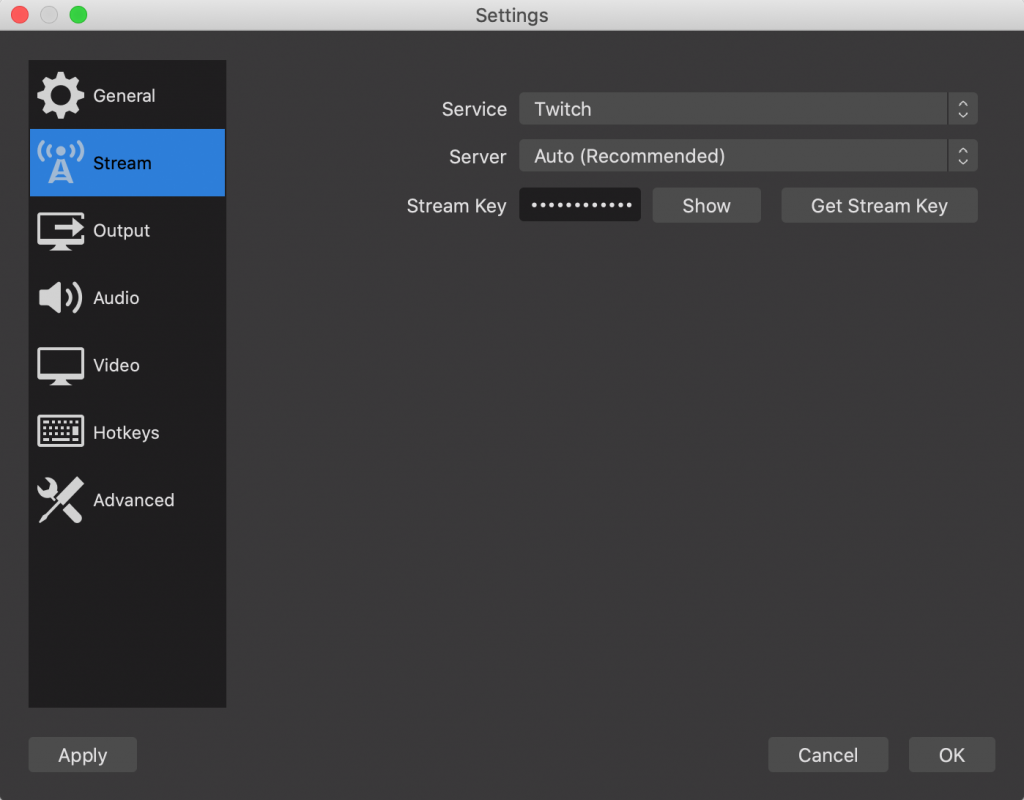
Now that we have Videosync’s output coming into OBS, the next step is preparing our connection to Twitch. Go to OBS’s Settings (bottom right corner of the screen, or CMD + ,), then go to the Stream tab, select your streaming service, and paste your Stream Key.
Setting up audio
By default it is not possible to output sound from Live to another application on your Mac. We can recommend Soundflower* [free] and the more advanced Loopback [free trial] for this, but in this example we will use Soundflower.
* At the Github page, scroll down until you see “JUST LOOKING FOR THE (SIGNED) SOUNDFLOWER INSTALLER?” and click the link below it. On the new page, scroll down again until you see a direct link to the latest installer file.
After setting up Soundflower, we can select it as an output device in Live’s Preferences, and subsequently select that output as an input in OBS’s Audio Preferences.


Ready to stream and record
Now everything has been set up, feel free to explore OBS’s other Preferences tabs. It’s a good idea to test out different settings for streaming or recording. Once you’re ready to go on the air, hit the Start Streaming button in the main window and check Twitch if the result is the same as what is on display in OBS.
Using multiple Syphon outputs

With Videosync, as of version 0.9.8, it is now possible to output multiple video signals from Live by using its Return channels. When you have this feature enabled in Videosync’s Preferences IO tab, every Return channel becomes a Syphon output, and you can route video signals to these Return channels by using the corresponding Send knobs.

By using multiple outputs you have the possibility to set different positions and sizes for different inputs, and increase your flexibility when it comes to combining video outputs from Live with other Sources and Scenes in OBS.
To read more about using multiple Syphon outputs, head over to the online Videosync manual.

Offloading video processing to another computer
It is not uncommon for streamers to use an additional computer system solely for encoding and streaming video to the internet, while using another computer system for their main activity (e.g. gaming). Similarly, if you’re running a Live Set that is already heavy on the audio side, it could be a good idea to offload video processing to a secondary system. This can be done by running Videosync on one Mac while Live runs on another Mac (or PC). To read more about how to do this, head over to the online Videosync manual.
Conclusion
For many years artists have relied on Ableton Live’s stability, workflow and ease of use for performances in front of audiences around the world, and adding video functionality to this very same workflow and even connecting it to the online stage will create more options and benefits to artists.
I hope this article could inspire you and incite some new ideas. Feel free to let us know what you think about our blog, and if there are any subjects you’d like us to cover that correlate with our field of work.